Home
 Products
 Cameras
Launch Monitors
 Software
 Enclosures
 ProTee
 E6 Courses
 Business
 Tech News
 View Cart
SCX Stereo Camera disparity to ball height
Calibration
Please note: Other than scaling, calibration is only really intended for fine tuning.
If you are experiencing major ball carry discrepancies, then the cause most probably lies elsewhere.

What is stereo camera calibration?
As each individual camera installation will be slightly different,
(i.e. cameras are mounted at different heights, different spacing, off-line and slightly skewed)
the main objective is to correct the factory set default calibration tables so that they match the particular users camera installation.
This page is mainly concerned with Disparity to ball height conversion.
Camera alignment instructions are dealt with on another page

Click above button to read more...
Let us do the SCX Stereo Camera Calibration for you
For us to do this, you would have to make 5 shots using a variety of clubs.
i.e. a driver, long iron or wood, a mid iron, short iron and a pitching wedge.
When making the shots, note where the ball hit the screen ( there should be a momentary impression in the screen)
Measure the height of the impression for every shot
and let us know the distance between where you played the ball from and the screen.
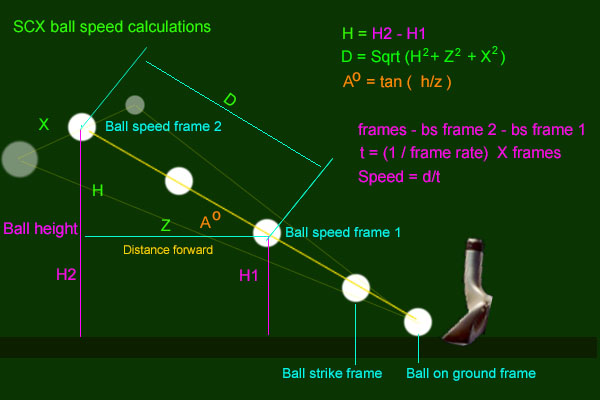
We can then triangulate to get the true VLA of each shot and compare it with the results in the CP
and make adjustments to the calibration table to match.
Send a CP shot video with every shot together with the ball impression height on the screen
Use just the CP without connecting to GSpro. i.e. select GSA Golf or API in the game selection in the CP's main panel.
After the analysis of your shot videos, we'll make a new SCX calibration table and send it to you.
We can also setup your camera alignment
and camera rotation correction for you
For us to do this, simply place two balls on the mat spaced at around 8 to 12 inches apart
that are perfectly in line with each other and facing straight ahead to the screen
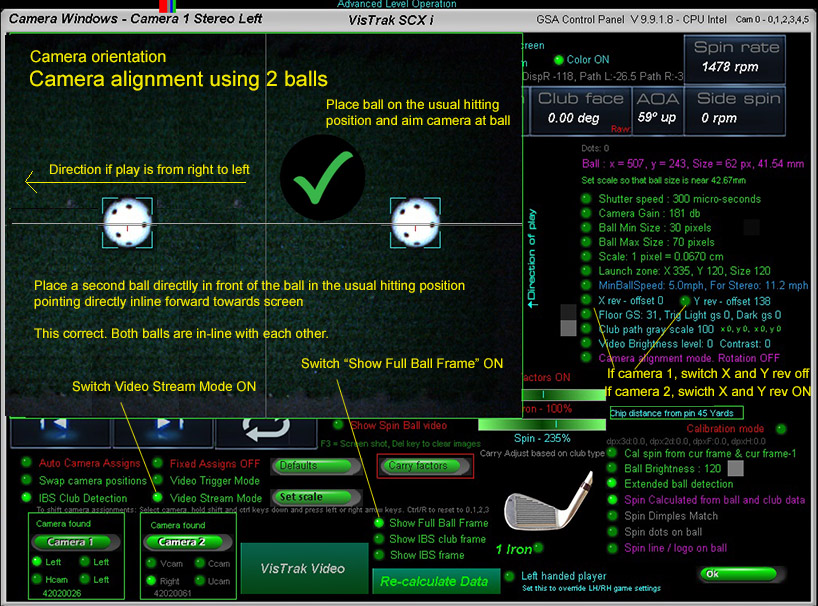
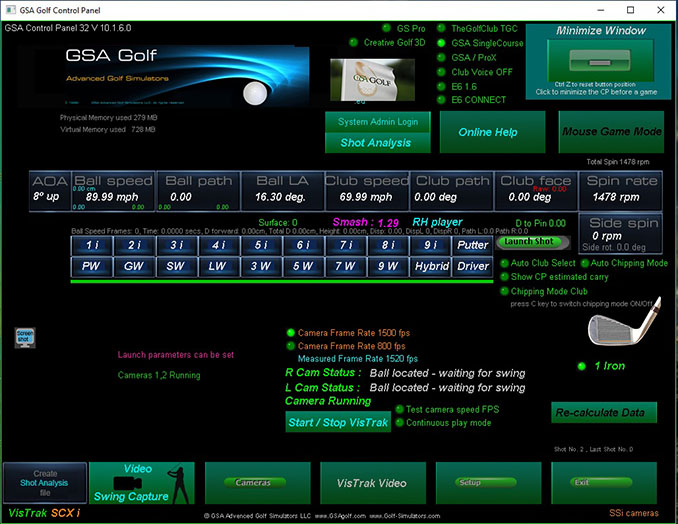
Then click the Start/Stop VisTrak button and then the "Create Shot Analysis file".
Note the video number and send us the shot video.
If you don't know how to send us shot videos, go to the Support page.


Super Easy SCX Stereo Camera Calibration
This method allows you to calibrate the SCX's stereo cameras with real shots.
The new Launch Angle Calculator is used to determine the real VLA of the shot and compare it to the CP's measured VLA.
You can then adjust the calibration table to match the CP's measured VLA to the real VLA .

This method of camera calibration is by far the easiest and fastest.
Step 1

Start the Vistrak cameras in the usual way from the CP's main panel
and place ball on mat.
Measure the ball's distance to the screen.
Step 2
Be prepared to note the ball impact position on the screen and strike the ball
The ball will probably make a temporary indent in the screen after the shot.
Step 3
Measure the height of the impact indent on the screen from the ground

Step 4
Go to the camera panel in the CP and select the "View Calibration Tables".
Step 5
Enter the measured ball distance and height values into the Launch Angle Calculator
Move the mouse over the 2 distance values and use the keyboard's up/down arrow keys to do this
The correct VLA will be displayed
Step 6
Compare the real launch angle from the entered values to the SCX's measured angle
(shown in yellow text next to the stereo disparity value)
If different, use the calibration Page buttons to see the measured Disparity value (shown in white) in the table.
In the above example, the disparity value was 46 (shown on page 2) which equated to a VLA of 48 degrees

Step 7
Use either the "Global Height Adjust" setting or the "Page Height Adjust" setting
to match the SCX's measured LA to the real LA.
You can repeat the above procedure using different clubs with various loft angles.
In this case, it's better to use the "Page Height Adjust" setting to match the VLA values
The "Page Height Adjust" only affects calibration values for the 25 rows in the page,
whereas the "Global Height Adjust" affects all values in the 150 row calibration table
Precision SCX Stereo Camera Calibration Steps
This method involves raising the ball on the mat in a series of known height increments
Methods of accurately raising the height of the ball for the calibration
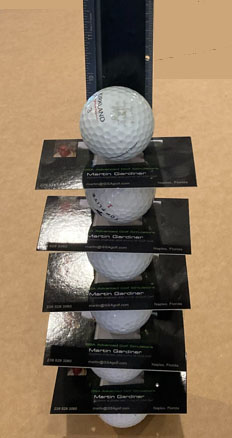
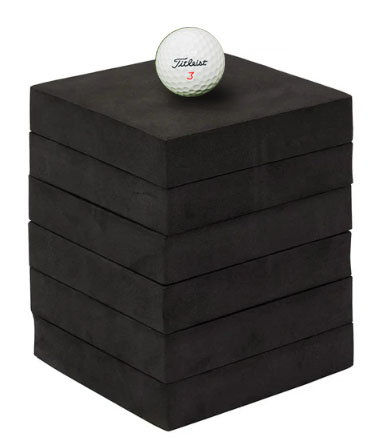
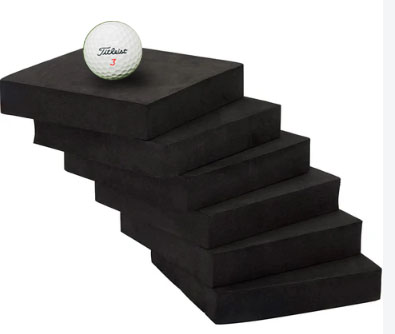
The left image shows a method of stacking golf balls using a straight edge (ruler) kept in an upright position
with double sided tape to adhere the balls to it separated by black cards that prevent the cameras from picking the underlying balls.
Golf balls have a 1.68 inch / 42.67 mm diameter so you will be calibrating in these steps.
Steps are:
1 ball above ground 4.27 cm
2 balls above ground 8.54 cm
3 balls above ground 12.81 cm
4 balls above ground 17.08 cm
5 balls above ground 21.35 cm
6 balls above ground 25.62 cm
The other images show how the ball can be raised in increments using black (rubber/ foam/plastic) blocks of a known thickness.
You will have to measure the thickness of the blocks in order to calculate the ball height depending on how many blocks are being used in every step
Step 1
This sets the ball to ground zero with near zero disparity
Step 2

Check to see that the ball is at or very close to ground zero
Step 3

The calibration table is used to convert stereo disparity values to real ball height off the ground
Step 4

Note: when raising the ball on the mat, use a dark non-reflective object to place the ball on
so that only the ball is detected.
You can use books covered with a dark material to elevate the ball to the desired height.
A black mouse pad is good to cover the books so that only the ball appears bright.
Note that ball height is measured from the bottom of the ball to the floor.
Ensure you click on the Soft Trigger in both the left and right cameras for every height and disparity reading
Step 5

Step 6

The stereo calibration table has 150 disparity entries that are split into 6 pages.
Each page has its own page height adjust value.
You can also adjust each disparity height value individually but this rarely required
Step 7

As the SCX camera ball height detection will effectively never go over 27 cm,
there is no requirement to adjust more than the first 3 pages of the table.
Done!
Stereo camera Disparity explained
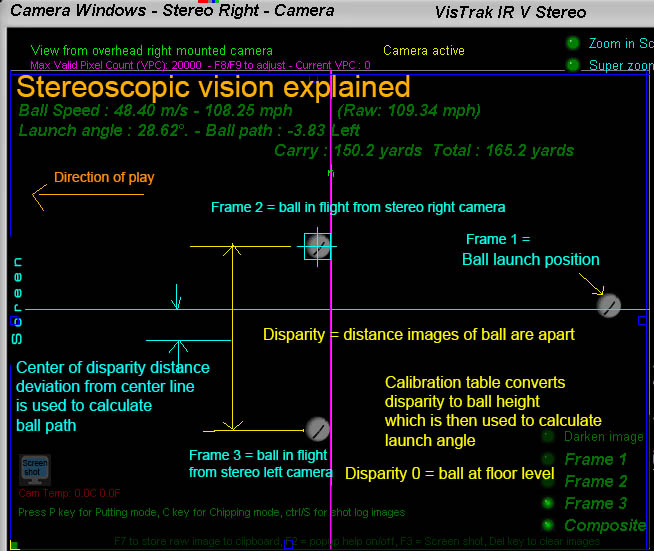
The above diagram explains the basic stereoscopic principles.
If the two 2 stereo cameras are aimed precisely at the center line and a ball is placed at floor level, the images of the will appear on top of each other.
The disparity of the ball is then zero (or near zero) and this is known as the "Converging point"
When the ball is elevated, the images of the ball in the camera frames will start to separate. The distance the ball images are apart is the "Disparity".
Using a "disparity to ball height" table, the exact height of the ball can be determined.
Knowing where the ball was before ball strike the ball LA and path can be determined.
Ball path is simply derived from the divergence the center of the disparity distance is from the center line.
i.e. a perfectly straight shot would show that the 2 ball images are the exact same distance from the center line.